Showing posts with label M8. Show all posts

Saturday, 15 January 2011

310 - Final prints for Emma

Below are the final prints for my theme with Emma.

I have chosen to show the work flow for one of the images, and I will also include 1 image printed on the college computer and 1 image from my home printer to show the comparison.

Here is the workflow for my chosen image.
This is a JPG version of the original RAW image in the camera, the reason for the jpg image is to load onto this blog. A polariser filter was used in natural light.

Here is a comparison of the image in 2 different forms to show the difference in the beginning of the post production. I do attempt to get the best image in the camera that I can to eliminate alot of post production work.

Here is the next image which shows the cropping I have chosen, which is to A3 proportions, along with some cloning to elimate the obstacles that do not add to the image eg the door pillar. Perhaps a slightly different view could have eliminated the door pillar for example in the original image to avoid some post treatment works.

This is the next part of the sequence where an adjustment was done in curves in this instance. there are many other means to achieve the desired effect eg addtional layers to alter the image, levels, colour management measures etc..

This shows how I achieved my final image with a final crop to tidy up any points that detract from the main theme of the image.

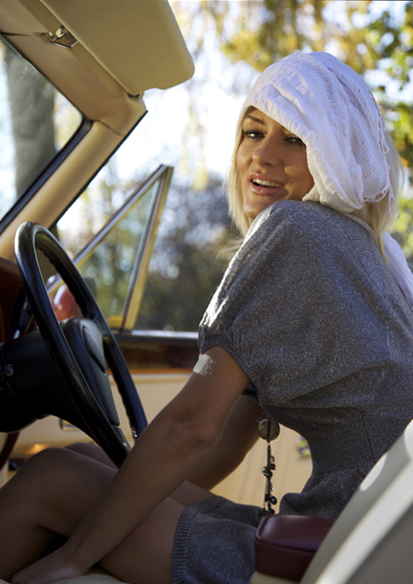
Please refer to my blog dated Monday 8th November 2010, which covers the day of the car shoot. This also shows my reserarch into car/model photography. The main influences were from Manfred Reinfried and Gabriele Rigon. I choose the above images based upon an adaption of the images that these photographers produced and shown on the previous blog. I would like to redo these images later on the year as November is perhaps not the best time of the year to do this sort of shoot, although we had glorious sunshine all day. we did use additinal lighting which is noted in other blogs below.
I will be printing off my home printer to show how this printer performs in relation to the printer used at College. At home I use compatible inks with Tesco Super glossy A4 inkjet photo paper (260gsm) which provides an acceptable print, but is not up to exhibition standard. At college I will be using a HP Photosmart B9180 printer, which is calibrated from the monitor, to the printer to the paper used. The paper used HP Satin Matt A3+ 250g/m2(Q5462A) which produces an exhibition quality print.


and here is the final image


EMMA


Set out below are the other final 9 images to complete the set. A similar workflow has been done on these to that above.


This also shows some of the jewellery that Emma was using. I had a separate theme to this one of Emma herself.

This image also links into the other theme I have been working on as it shows Emma's jewellery that I asked her to wear. The other theme is only of the jewellery itself, but this another way to present the jwellery, depending on the client need.The jewellery was her own and this image is in line with my research on how to photograph jewellery. The light has been reflected here onto Emma.


I have provided an A2 portfolio with the above prints slipped inside. The presentation of these images is to illustrate the final putcome of the workflow, from idea through planning, costing, preplanning of the shoot amnd finally the shoot itself. From there the images have been downloaded and produced and are now set out in the portfolio.


Monday, 10 January 2011

Unit 310 - workflow for Jewellery -to be continued.

Workflow for Jewellery shoot.

This is the 2nd part of my brief, to produce images to include in a catalogue of jewellery.

My first thought was to how to accomplish this, and where. I decided that the best place to do this would be in the college studio, as I do not have the full facilities at home.

I then visited the studio to work out how I was going to do achieve this, and decided to use the light table instead of a light cube. This would give me more latitude to photograph the jewellery. I had previously used a lighting cube to do a product shoot, but found that I could be more flexible without it.

I then decided how to light the jewellery. This would be using a variety of the studio lights, and once set I could reuse the set up with minor alterations, depending on the piece of jewellery.

My next step was to source the jewellery that I was going to photograph. I acquired several pieces of jewellery, and set about planning how I was to produce images for this.

I then booked a date for the studio. I then photographed a variety of items.
Below is an image of the set up I used.


The light table was set up and the lighting is as follows:-
Softbox reflecting light off the floor to the underside of the table --GM500R set to power level 1 and 1 tenth.
Softbox set at 45 degrees at the front -- GM500 set to power level 1
Snoot with honeycomb set at low to opposite side of softbox -- Esprit 500 set to power level 1/32nd.
The camera was both hand held and also for most of the shots mounted on a movable stand.

Adjustments were made mainly to the aperture on the the camera to achieve the correct exposure when imaging the different items of jewellery, whilst leaving the lighting generally as noted. There were occasions when I did adjust the lighting slightly, either changing the power level or by slight movements of the lighting.

Post production was done in the same manner as the Emma shoot, downloading to a seperate folder, editing and deleting unacceptable images, choosing a selection, then editing the final choice of images.

I have included also here an example of some post production work that I have done on one of my images of the cuff links. This would be typical in the case of jewellery photography ( apart from the picture clipping)as at times it is impossible to not show some lighting/feature that is not required int the image.

The first image is prior to the post production. It shows an obvious streak of light, and the photographer is shown to the left, as a pink line,and as a reflection, with some bright spots. the second image shows some adjustments made to to take out some unwanted reflections and a line of light. Please note that the image is zoomed in to over 200% of the the original.

Also shown below are some grab shots of my workflow to show how I get to my final print.

This shows my intial crop of the actual image. No point in altering the image if you are going to crop later.

This image shows the initial printing page for my Epson
 R220 printer at home. it shows the printer, page set up button and allows you to scale to fit media. it also allows you to adjust the colour management for the print.

this screen allows you to cahnge the quality and various other parameters, such as Best photo print eg 

Once you have pressed print then this progress screen appears. It also shows the ink levels, and should be checked each time to ensure you have enough ink prior to printing.

this is a sreen capture of another item.

See later blogs for images produced and comments.

Tuesday, 28 December 2010

unit 310- workflow

Workflow for Emma shoot
Once the brief had been given and discussed then it was time to put the wheels in motion to obtain the result. This started with several ideas and phone calls to establish the requirements. What was needed was a model, a car, a location and the equipment.
Emma was contacted and the shoot details were explained and the date suggested, and the location would be advised as soon as it was agreed. I contacted the cars owner and went to see him to discuss the arrangements. He also suggested that I use the location there, which made a practical solution as the car/s would be available all day. A date was set at this point, and was then communicated to Emma, who was available that day.
 I did visit subsequently to prepare for the shoot. In the mean time I obtained some lighting (borrowed from the college, along with an external battery pack), so that I had a choice and did not have to rely on small flash units, or completely on natural light. I had planned to use natural light as best but the additional lighting was part of my backup.
As the shoot was going to be on location, I had to come up with an alternative plan, but I did not have to use it. The alternative would have been to reschedule another day if necessary.
Prior to meeting the owner of the cars, my assistant and I went exploring to seek out some locations. However, once I had agreed the location with the owner of the cars, we went to explore the area to sort out where we could photograph. Once we had done we set up the lights we had borrowed local to the college to understand how they worked and could be used.
Confirmation phone calls were made to confirm the day and set up, and the day turned out to be cool and sunny.
Once the shoot was concluded, everything was packed away and returned from whence it came. The images were downloaded onto my PC and then copied to a separate hard drive as security. From there I deleted the obvious images that were not so good due to eyes being shut, too much highlight, out of focus etc. Then I started to put the images into a separate folder that I could use, and then post produced some of the images.
Below is series of images illustrating the above.

This was a location I thought would be quite good. It was part of the Sudbury Hall estate.

This is another angle that I tried, using the building as a backdrop to the car.

With the car in position it was time to introduce the model (my glamorous assistant), to see how the lighting worked, and how the background would work.

Trying to get some detail shots. 


An even closer detail. more lighting required. Time of day is going to have be thought about.

Detail within the car

This was the first visit to the location of the cars, and after talking to the owner about using his location,
and I thought this might be a good position for the day.
This was the view at the end of the short gravel drive, which I contemplated I might be able to use.

This is the view of the gravel drive, and the trees have still got foliage on, so I can use the shade.

This is the trail to set up the lights, and to make sure they work.

setting up the lights

Detail of the battery pack.

starting to set up the lights.

a 2 light set up

The final result. I now know how the lights work

After setting about the lighting I went back to the location and this was one setup I tried.

This was another set up.

I did note that I had be careful with the reflections on the car body from the lights..

Have to try to elimate distracting reflections.


Using both sunlight and lighting. Underexposed for the background.

Just for fun noted the reflections in the car.

Using software I created a folder for all the images taken. Copied to a seperate hard drive as well. This is shown in Photoshop Bridge.

This is shown within the folder of the images, within Bridge again.


I then choose a selection of images and placed them into another folder for post production.

This is one image that I have post produced. All I have done here is crop the image to the size that require. I have taken note of the image I need when taking the initial image.