Showing posts with label 212- D1. Show all posts

Saturday, 15 January 2011

310 - Final prints for Emma

Below are the final prints for my theme with Emma.

I have chosen to show the work flow for one of the images, and I will also include 1 image printed on the college computer and 1 image from my home printer to show the comparison.

Here is the workflow for my chosen image.
This is a JPG version of the original RAW image in the camera, the reason for the jpg image is to load onto this blog. A polariser filter was used in natural light.

Here is a comparison of the image in 2 different forms to show the difference in the beginning of the post production. I do attempt to get the best image in the camera that I can to eliminate alot of post production work.

Here is the next image which shows the cropping I have chosen, which is to A3 proportions, along with some cloning to elimate the obstacles that do not add to the image eg the door pillar. Perhaps a slightly different view could have eliminated the door pillar for example in the original image to avoid some post treatment works.

This is the next part of the sequence where an adjustment was done in curves in this instance. there are many other means to achieve the desired effect eg addtional layers to alter the image, levels, colour management measures etc..

This shows how I achieved my final image with a final crop to tidy up any points that detract from the main theme of the image.

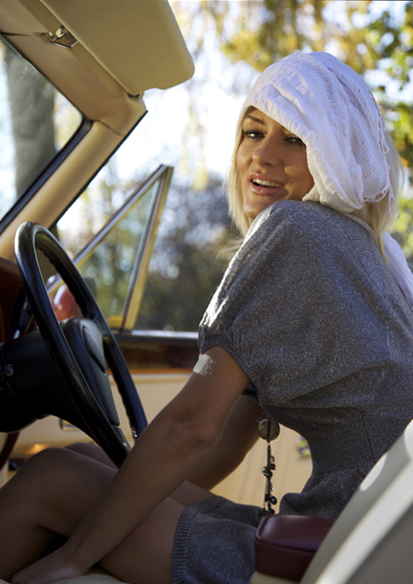
Please refer to my blog dated Monday 8th November 2010, which covers the day of the car shoot. This also shows my reserarch into car/model photography. The main influences were from Manfred Reinfried and Gabriele Rigon. I choose the above images based upon an adaption of the images that these photographers produced and shown on the previous blog. I would like to redo these images later on the year as November is perhaps not the best time of the year to do this sort of shoot, although we had glorious sunshine all day. we did use additinal lighting which is noted in other blogs below.
I will be printing off my home printer to show how this printer performs in relation to the printer used at College. At home I use compatible inks with Tesco Super glossy A4 inkjet photo paper (260gsm) which provides an acceptable print, but is not up to exhibition standard. At college I will be using a HP Photosmart B9180 printer, which is calibrated from the monitor, to the printer to the paper used. The paper used HP Satin Matt A3+ 250g/m2(Q5462A) which produces an exhibition quality print.


and here is the final image


EMMA


Set out below are the other final 9 images to complete the set. A similar workflow has been done on these to that above.


This also shows some of the jewellery that Emma was using. I had a separate theme to this one of Emma herself.

This image also links into the other theme I have been working on as it shows Emma's jewellery that I asked her to wear. The other theme is only of the jewellery itself, but this another way to present the jwellery, depending on the client need.The jewellery was her own and this image is in line with my research on how to photograph jewellery. The light has been reflected here onto Emma.


I have provided an A2 portfolio with the above prints slipped inside. The presentation of these images is to illustrate the final putcome of the workflow, from idea through planning, costing, preplanning of the shoot amnd finally the shoot itself. From there the images have been downloaded and produced and are now set out in the portfolio.


Monday, 27 December 2010

212 - general workflow chart

I have produced my own basic crib sheet for use on planning a shoot. the details will be different for any shoot and this chart serves as a starting point

General workflow chart (assuming using digital cameras)
Pre-shoot

Idea – subject matter-on location or studio based (depends on subject and style)/ or brief for a client.

Prepare story board as required

Locate subjects –either people, objects, or both

Contact people, arrange time and describe shoot. If abroad check facilities and accommodation and travel details

Arrange to collect/use objects, and return details

Arrange dates at location, either on location or studio based

Decide final presentation of images

Arrange for assistants as required

Arrange for make-up/dressers/ props etc

Decide and sort equipment for shoot. Ensure all is in working order and batteries will be charged as necessary. Ensure sufficient power available

Carry out pre-shoot survey as required in either location.

Check on any health and Safety requirements/any restrictions to the location.

Check sufficient power available and the space required.

Confirm dates and actions

If working on location check the weather eg and if abroad check for any restrictions

Have a plan “B” should anything disrupt plan “A”, or arrange alternative dates

Double check all arrangements


On the day

Arrive at location/studio

Set up equipment as required

Ensure all parties are present and aiming to complete shoot/make up done etc

Explain reason for shoot and outline procedures/ allocate responsibilities

Make a start, adjusting as the situation arises, due to artistic/restrictions etc

Edit/ artistic changes as the shoot progresses

Save images to another source as you go along to prevent loss

When complete pre-check images and re-shoot if necessary

Thank everybody for the time and effort

Wrap up the shoot and return everything to as it was at the start


Post production

Download/copy images to another storage area

Confirm originals are OK and at least 2 copies available

Pre edit and delete unusable images

Post produce images using suitable software

Print/display images as required at the beginning

If a paid job see/discuss with client/get paid


Refer to other blogs regarding client jobs and pricing etc, but this chart is a good starting point

Sunday, 26 December 2010

212 / 310 -Workflow/rights video and general tips for saving your work, etc

N i n e - V o l t : Photography news, tips & goodies

Check out the video on workflow within this web site. I found this a very interesting video as it illustrates how much work goes into the final production of the shoot. All the equipment and IT stuff has needed to be planned and costed and implemented. It would be an absolute disaster if all theimages and work done on the day of the shoot was lost.

All this expertise and euipment needs to built into the planning and costing of any shoot, and the client may need to be aware for the reasons to justify the cost.

It encapsulates all that I was taught when working in IT, and it shows the extent that as a professional photographer how far you have to go. Not only is the kit required to actually take the images, then to  prepare the images immediately they are taken, including backups, in the field (if on location), then the amount of kit required to store and process the images.

Also checkout the image rights video as this explains the main points to look out for.

There are loads of links and items on this web site, so take your pick!

Saturday, 4 December 2010

212 Working to a Photographic Brief.

CITY AND GUILDS UNIT  212

With the choice of film or digital cameras these days, my choice of camera has been the DSLR. This is because I have now taken on the challenge of using Digital photography. It is interesting to note that the best of the modern photographers were well schooled in the art of film photography. Therefore, the way that I will be looking is the way the photographic image is produced and manipulated will be based on the way the digital world works.
Each assignment and project will require different time scales and various different locations. Each photographer is an individual and will approach an assignment in a different way, therefore the approaches will be different, as will the costs and variety of each image and shoot.

Elements of a project brief
The concept of the idea is the first thing that comes to mind, as is what and how you are going to photograph. The next step is to work the idea given within the brief that has been given to you. The following step is to ascertain what the final image the client is after and to which format. Who is to provide the model, accessories props etc is the next step. Location of course is a vital consideration, studio or on location, as is the time of year should an outdoor location shoot be required.
The aim of my brief either is to produce an A4 book, online or printed, and each image being shown in various ways. The research element is to be viewed separately for the details of the idea in mind.

Imaging approaches

With digital images these days there are so many solutions as to how to present them, the choice is very wide. First of all you have the home, or your own printer setup, printing solution, then the opportunity to go to a photographers or similar shop to get you prints done (Boots as an example). There are various on-line facilities, of which there are many.
However, the final images must meet the criteria set by the client, or you own personal preference.
It is best to decide how you are to approach the shooting techniques, whether to shoot with just a memory card in the camera, tether the camera to a laptop or PC, or both, depending on the situation.
There are also so many ways to save digital images. The method chosen depends on the longevity requirement for the images, and future proofing images is also a consideration with the rapid changes in technology. CD/DVD is one solution but there are a couple of considerations. Some advertising images but are not necessarily needed to be kept, but some are. Images can be stored on servers and PC’s, either “at home” or on server farm remotely. The final presentation has to be considered when deciding upon how to store and present the images. Advertising images are generally used in magazines and on posters, so when taking the images, and as part of the shoot, this has to be built into the planning part of the shoot.

Estimate of resources

The resources I would need are:
Time to prepare the outcome
My relevant choice of equipment to use, i.e. camera, selection of lenses, flash units, external lighting source, telephone, props etc
Provision of power packs etc to suit lighting and/or other electrical equipment e.g a laptop. Batteries can be included here.
Use, or loan, or hire of car/s, model/s, jewellery, shoes etc
Decide what items to buy to complete brief eg shoes
Location or studio as required
Background, either on location or in the studio
Time scale required
PC or MAC to post produce images with relevant software to suit.
Transport to the location where required

Imaging approaches
The first approach was a location shoot using a car and model.
This involved sourcing all three parts.
The first was a phone call to a friend who knew someone who had a Ferrari, then obtaining a model and sourcing some accessories, and finally a location.
I spoke to the Ferrari owner, who said we could use his car, who then offered his hotel as a location. My assistant and I did a pre- shoot to investigate the location, and deciding where we would locate the car to shoot, and some trial shots using our car. We then did another trial shoot at college to work out how to light the car with the equipment we had to borrow from the college. 

Estimate of time
This will depend on the nature of the job, and the experience of the photographer, and will also have to fit in with the clients requirements. This can be a quite difficult part of the excercise, but experience will bw a valuable commodity here.


Estimate of costs
My job as a photographer is to provide the best photography for my client, to meet his needs. To do this a workflow is needed (see separate Item), and time needs to be taken to think through the process of the job at hand.
When the layout has been produce then I need to go through the job step by step, as every detail is important.
For this particular brief the following applies, as it is in two parts.
On location:-
Time a) phone calls to arrange date and details 2 hrs
          b) set up time, preparations for the shoot.
         c) ensure all props are prepared and reday for use
         d) ensure all models/ equipment/articles to photographed are ready
         e ) if on location outdoors be prepared for any changes in the weather. cloud cover etc.

Workflow
1.      Plan for every part of the project. What is it I am going to create? What is the end product? If I want images for the web, resolution is not as important. If I want to print, then I need to know the target resolution and the required colour profile of the output device. I also need to know the file format requirements for the final media, which is a printed book and web images. I need to scout the location. What time of day is the best time to photograph? Limited on car shoot by access to cars etc. I need to visualise the photograph I want to take and the tones I want in the end product. I need to think about how to highlight the fashion accessories, and what positions I would like to see them in. I need to think about what lenses I am going to use, whether I need lighting or any other special equipment. Consider the use of a tripod etc. Will I need an assistant? Then I need to gather all the equipment and materials I need for the shoot. And to check the weather forecast for an outdoor location shoot, and have a plan B if possible.
2.     Now I need to focus on preproduction. I have scouted the location as part of my planning, and I am starting to visualise my images. I have assembled my lighting and props, umbrellas ,etc . I am now doing lighting checks, and using the tripods. I do need to set up my camera for bracketing and white balance, depending on the final output I require for the book. I need to ensure I have enough battery power available for the shoot, for camera lighting and accessories. Preproduction encompasses all the things I need and want to accomplish prior to shooting.
3.     Record the images as per my visualisation, and show the models the tear sheets so that they have a good idea of what is required of them prior to the shoot. Ideas may change when actually taking the images.
4.   Then I begin my post-production, which in this case means loading the images onto my computer and editing them for cropping, colour, contrast or any other image defects I spot or are not suitable. It may be that minimum editing is required depending on how good the initial shoot was. I then need to prepare the images for production. Printing images may This is the production phase, and the final step. Here is where I decide which printing option I am going to use (I have done this from the beginning), either printing from a local printer or a commercial printer, to be sent in a format that can print from (eg DSCL require jpeg). Resolution and format are key to the photographic reproduction then it is important to plan from the beginning. I can then meet my target as set out from the beginning. The important part is that resolution and output size must be understood during the planning stage, so that I can get to the processing stage with the correct images.

 
Legal considerations
Data protection and confidentiality must not be overlooked, so as protect the identity of the person /s involved. Intellectual rights and intellectual property refers to creative work which can be treated as an asset or physical property. Copyright needs to be established prior to any shoot. Civil law needs to be addressed and not limited to Employers Liability, Protection of Children Act, Criminal Justice Act to name a few. Each project needs to be considered on it's merits and apply the law where necessary.

Health and Safety etc
It is the Employers responsibility to protect the Health and Safety and Welfare of their employees, and other people who might be affected by their business, so far as is reasonably practicable.


Sunday, 19 September 2010

205 Photo imaging equipment and materials Part 3- Health and Safety

Health and Safety


Photographers have to be aware of the environmental and health issues in Photography. Not so much now but many of the chemicals that are/were used in Photography can be and are damaging to your health. The 1974 Health and Safety at Work etc. Act needs to be referred too. Employees and public must take reasonable care. Risk assessments should be made for all activities, including fire precautions, using display equipment, manual handling and control of substances COSHH, either in the studio or out on location. The Photographer should have the appropriate current employer and public liability and vehicle insurance. The photographer should have a formal agreement with the customer.
Studio
Setting up a studio eg means you must comply with the health and Safety Act, especially if you hire an assistant and have the public in. If you are using chemicals then proper ventilation must be in place, not annoy the neighbours with the smell, and have proper methods of disposing of the used chemicals. It is also important to have the proper insurance in place when running the business.
In the studio trip hazards are a particular problem, with trailing cables etc. At Burton college studio for example the majority of the lighting is suspended from the ceiling which eliminates many trip hazards. Safety cables must be fitted to ensure that no accidental damage can be done. However, care must be taken to ensure the correct fixings are stable. Trailing cables should always be taken and routed away from the working area as much as possible. Props, backdrops and materials should always be put away when not in use. Models should not be asked to move props etc, nor adopt dangerous or uncomfortable poses. The minimum number of people should be in the studio, and all should be briefed on the potential hazards. Check all equipment is in good working order prior to your subject arriving.
All electrical appliances and equipment must be tested for electrical safety, and maintained by a competent person. Only trained persons should use and move any electrical equipment. All studio flash units should be covered with a soft box or similar piece of equipment to help prevent burns from exposed flash units. Only trained persons to be allowed to operate the lighting system. Need to ensure that flash units do not get too hot so as cause ignition or burn anybody. No naked lights etc are to be used. Where flames of some sort are required for the shoot, then the necessary fire fighting appliances need to be available, to be used only by competent persons.
All persons need to informed of all the safety regulations, evacuation routes and shown where the fire exits , smoking areas, etc are.
Location
The photographer should visit the location prior to the shoot to establish any hazards, and carry out any risk assessments required. If in a public place then this has to be considered. Consult the customer on any location risk and decide what actions are required, and take any actions to minimise any identifiable problems. Comply with any reasonable requests or rules at your location.
Observe the countryside code in all aspects when out on location. When in the hills and mountains take special note of the weather conditions. Plan your trip so as to use the minimum of equipment to carry. Ensure you are aware of your surroundings and plan accordingly. Don’t take unnecessary risks, and if appropriate inform somebody of where you are going and when you are likely to be back.


Saturday, 18 September 2010

205 Photo imaging equipment and materials Part 2

Advantages and disavantages digital v film.

There has been much debate over the years regarding this subject. Nowadays digital seems to be the main means of producing images, as the quality of even the cheapest cameras ( let alone some mobile phone cameras) is very good, Only the size of print decides which camera is used.
Image quality is obviously paramount. Digital cameras have a variable relationship between resolution and megapixel count, whilst film depends on upon the area of film used to record the image, 35mm, medium format or large format. Also the speed of the film and the quality of the lens has a great effect. Large format cameras are rarely digital.
Digital sensors are arranged in a regular grid pattern whereas film has a random orientation of grains, both of which affect the resolution of the image. 35mm Photograph resolution varies according to speed of film etc but a 36mmx24mm film with an ISO of 100 has equivalent pixels of approx 15 megapixels. Many professional quality cameras use medium or large format cameras. A medium format film image approximates about 50 megapixels. A medium format DSLR provides from 42 to 50 megapixels, but cannot be enlarged with the same level of detail as medium format film. However, the technology is improving all the time so it might eventually catch up.
Noise and grain can cause a problem for photographers (unless required deliberately). Noise is degradation of pixels showing an incorrect colour, whilst grain and film sensitivity are linked, in colour film grain being obvious in areas of even and delicate tone, not quite so in black and white, whereas with digital the long exposures tend to show more noise.
With film you do have the need for a darkroom, and the facilities for one, and all the paraphernalia required to develop both the film and the image as two separate actions. This is also a timely operation, whereas with digital all you need is a computer, a printer and relevant software to produce an image. There is a cost to both, but the time investment in film is more.
Dynamic range is another feature that can be assessed. It is difficult to play the two against each other but briefly;
Low-contrast film has greater dynamic range and higher contrast.
Do you use the data format as raw or jpeg?
The larger sensors in DSLRs and medium format cameras collect more light than the compact camera sensors, but the smaller sensors are getting better and the dynamic range is improving.
Variations in optics, sensor resolution, scanner dynamic range and precision of the analogue to digital conversion circuit cause variations in image quality. It is very difficult to compare the dynamic ranges between film and digital.
Optical versus digital prints differ between media and between images shown on VDUs. There is also a variable difference between venues/computers showing your images.
The effects of sensor size have an impact on your choice digital camera. Most sensors are smaller than the 36mm x 24mm exposure frame of 35mm film. With digital this has the effect of extending the effective length of the lens eg a 100mm lens then becomes approx 160mm(depending on make of camera). This is due to the manufactures using lens mounts designed for film cameras. If the camera has a smaller imaging area than the lens’ intended film frame, its field of view is cropped. This does have an advantage over the “full frame” cameras as the lens in effect becomes longer. It also affects the depth of field ( greater for digital), light sensitivity and pixel noise ( the smaller the sensor the more likely noise will develop). Here is an illustration.

Dust is the curse of photographers whether film of digital, as it can scratch the film, either in camera or in the darkroom, or get on the sensor and spoil the image. With digital this can be erased with software in the computer but adds additional time and effort to producing the image, and could occur in an awkward part of the image and be very difficult to edit.

Film can be scanned to digital with the correct equipment, and then manipulated on the computer. This is becoming an increasing part of archival life for instance, but takes a lot of time and is a very slow process. But decisions have to be made regarding archiving your images. There are many ways from keeping them on computer eg, or printing them. Archival printing is very expensive, but is keeping images in electronic form likely to last longer. This is a specialist area, and needs further investigation as to how best to preserve you images. What happens when computer software becomes redundant, how would you view your images in 50 years ? Bearing in mind that photography has only been around about 120 years??? In what medium do you store your images that you wish to keep? Many images can be transitory, but the rest???

Price is also a significant consideration. Film and digital imaging systems have different cost emphasis. Digital cameras are more expensive than their film equivalent, but are falling, and taking photographs is effectively cost free. High quality film cameras are less a complicated, therefore less expensive, ongoing film and processing costs being the major expense, and getting rarer. Film prices have risen as supply reduces.

I personally enjoy the freedom that digital photography gives me. EG when in the studio doing portraits I can connect my laptop to my camera, and can instantly show the person I am photographing the image. This makes getting the right image easier as the sitter can see the difference immediately and makes direction easier to achieve that. Also the sitter can have an impact by discussion at the same time. It also means I can change the lighting etc to suit the image I am trying to create. However I feel that the film black and white is much better than the digital version, albeit that the work has to be done in the darkroom, and depends on so many factors that are variable.


205 Photo imaging equipment and materials Part 1

Characteristics of a digital camera.
There are many characteristics associated with digital equipment. Nowadays 35mm photography is using nearly all digital equipment, including hobbyists, amateurs, professional, news and sports, and specialist photographers. This is mainly due to the ease with which the image can be viewed immediately and therefore easier to capture the correct image, even in the heady worlds of news and sports. The action can be immediately sent via the internet to where the images are required. Digital imagery has taken off due to the equipment having a great variety of types and prices, so is accessible to everybody one way or another, including some fairly decent mobile phone cameras these days.
 It is also very easy to edit the digital image at leisure or immediately, and can be done in a very small space, even out in the open eg with sports photography, via a laptop eg. There is a great deal of computer software to enable the images to be edited, the favourite being Photoshop, although there are several others that are just as good.
Digital images can be stored in several ways; an internal non-removable type of storage (normally reserved for video), a floppy disk(now almost redundant), a compact flash card(can prove expensive),a smart media card, a USB memory stick, an external hard drive attached to a computer, or on computer, either at home or what is known as on-line storage on a remote server, or uploaded to a web site, either your own or another source. The images can be downloaded via a cable to the computer, or in some instances by wireless technology. These types of storage replace film, either negative or slide, and are known as the storage media. I myself tend to keep 2 copies of my images on separate hard drives should I have a problem with my computer or one of the hard drives.
The larger medium format cameras and above are still mainly of the film variety. These are used mainly for internal fashion shoots and for large poster size prints, but the digital medium format camera is gradually being introduced.
Print costs are an issue with digital images. Most people tend not to get them printed and just leave them on their hard drive (as I do!), but I have invested in a digital photo frame and use this to look at my photos. It so serves as a means of viewing my images prior to printing or editing. It may take a while to study and look at my images, so this is a good way of viewing them over a period of time.
The current crop of Photographic magazines, both amateur and professional, are very informative with regard to reviews of many types of camera, and also give tests of new equipment on the market. As is the internet. Here you can find all sorts of information, including quite important information from the manufactures. Their websites give all the necessary information to enable you to make an informed opinion for you own needs and type of images you take. You can also see here all sorts of reviews and comments, but you have to use your own judgement for these.
Looking at some of the individual characteristics then;
Resolution – Digital cameras store images in pixels. Each pixel has its own information, colour and brightness. The more pixels the image has the more detail is contained within that image. To view the image on an external monitor, eg a computer, then the resolution must match. The viewing of images is determined by the resolution of your viewing medium, be it computer screen or TV eg. Pixel density in your camera of choice would be an important consideration. You also need to be aware that the camera uses a compression algorithm .There are various forms in use, the most popular is jpg, but there is also tiff, and more commonly RAW, which gives a lot more latitude when editing. The computer however needs to uncompress this information to enable viewing of the image, so your computer needs the software to do this. Many computers include a picture viewing software package as standard on the hard drive, which means all you have to do is select an image to view it. You do need specialist software to view RAW images though usually.
 When printing your image you will concerned with two things: the number of pixels across and down in your image; and the number of pixels per inch in your image. You would therefore have to match your printer requirement with your camera choice to the size of print you would want. However, with printing I use an on-line printer outfit to produce my images. Various software packages allow to insert images into documents, so you do not have to always adjust your image to fit, a very useful bit of software indeed.
Exposure- There are many different setting for exposure depending on your choice of camera. Most have Auto exposure(except the top end cameras eg Canon D1range)and many have the means to select a manual exposure of many varying sorts. The exposure will depend on the light, and the photographers preference to the image he is trying to create eg. The quality of the lens used, the aperture of the lens needs to match the lighting conditions encountered, preplanning will be necessary to achieved the best combination. Price of some of the lenses will dictate the use and of the image making. The different shutter apertures will also need to be considered when deciding which equipment will be needed on any particular shoot. Some examples are noted here.


Lens-these are a very important consideration to how your intended image are to be produced. Some cameras have fixed lenses, such as the modern compact camera, but the SLR does have interchangeable lens, which enables you to capture the image you intend. Consideration has to be taken as to the time of day, location, intended image, and also whether to have to carry the equipment any distance. Choice of lens before you set out is very important. There is such a wide variety these days. EG landscapes may require a wide angle lens, whereas a portrait might require a 105mm lens. Zoom lens are excellent these days and you can cover a lot of assignments with just two very good zoom lenses.
Viewfinder-There are two types of viewfinder, the LCD display and the optical viewfinder. Each has its advantages and disadvantages, but the modern cameras now mainly now come with both. Some of the smaller compact cameras may only come with an LCD display. Some of the latest DSLR’s now have a vary angle LCD display screen that rotates, which can be very useful in some instances, care needs to be taken though not to damaged it. See pros and cons below.


Video output- many of the DSLR cameras include a port and a cable that can connect to the RCA jack on television monitors. This allows the photographer to show the images directly on large screen display without ever having to pass an image through a computer. Some cameras now have a “slide show” option, where the camera will show individual images advancing at a specific time increment, or by a touch of a button on the camera. An example of this use would be in teaching, sales pitches, and could cover a wide variety of subjects.
Power supply-Since all cameras are mainly portable then a portable power source is required. This is usually by battery, and there are many different sorts. Some cameras require a special power source to that type of model. It is also advisable to carry a spare charged up battery to suit your camera at all times. When in the studio for instance though and the subject matter is compatible then an AC to DC adapter may be used as an alternative.